On This Page
Configure Payment Options
Payment Options in the
Smartpay Fuse Portal
enable you to control which payment
methods appear in your checkout and in what order. Follow these steps to customize
the available payment options in Unified Checkout
in the Smartpay Fuse Portal
:- Log in to theSmartpay Fuse Portal:Production URL:If you are unable to access this page, contact your sales representative.
- In theSmartpay Fuse Portal, go to the left navigation panel and choosePayment Configuration>Unified Checkout. TheUnified Checkoutcustomer experience page appears:
Figure:
Unified CheckoutPayment Options Merchant Experience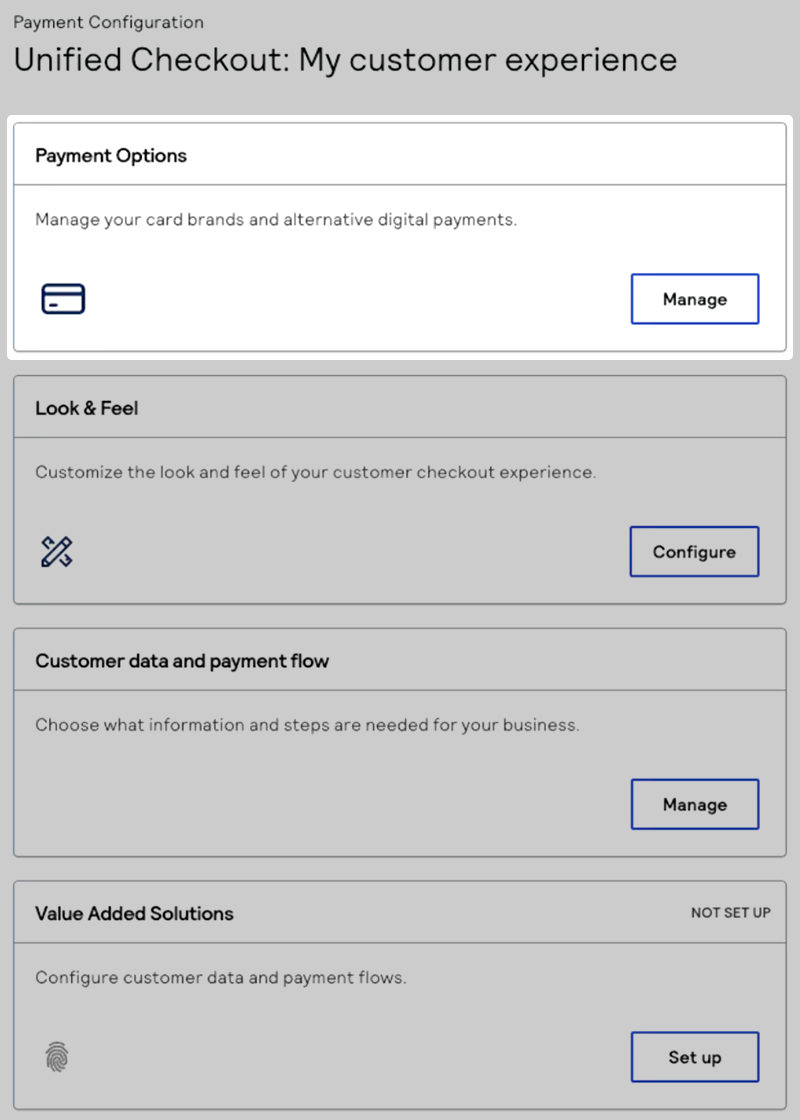
- In the Payment Options section, clickManage. The Payment Options page appears.
- Under Payment options, click the checkbox next to each payment method that you want to display in your checkout UI. Click the drag icon (
 ) to rearrange the order of the payment options.IMPORTANTSome payment options are set at the portfolio level and cannot be reordered. When you see a pin icon next to a payment option, you cannot move that payment option in the list of available methods. You must contact your portfolio administrator if you want to reorder the list of available payment options.These payment options are supported byUnified Checkout:
 - ClickManagenext to each payment type that you want to configure. The configuration page for the selected payment type appears.
- Under card brands, slide the toggle (
 ) to display the card brand logos in your button
list.Click the checkbox next to each card brand that you want to display in your checkout UI. Click the drag icon (
) to rearrange the order of the card brands.
) to display the card brand logos in your button
list.Click the checkbox next to each card brand that you want to display in your checkout UI. Click the drag icon (
) to rearrange the order of the card brands. - ClickSave and publishto save your payment options configuration settings.